How To Paint a Weeping Willow Landscape
September 6, 2024
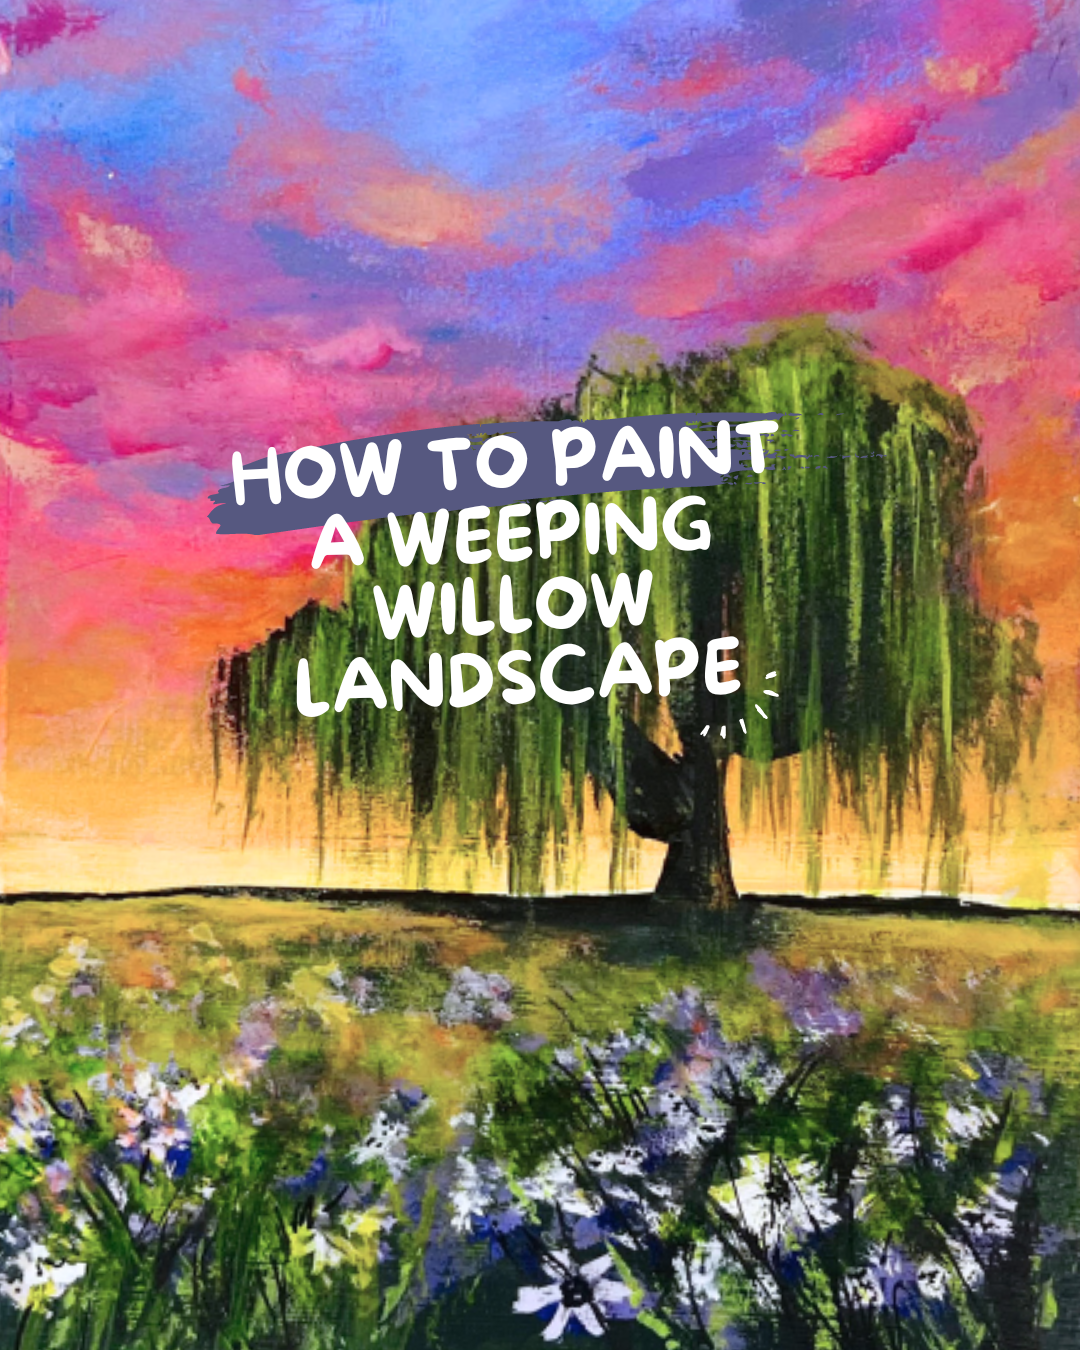
Let’s dive into how to paint a weeping willow landscape together. Whether you’re just starting out or have been painting for a while, these simple steps will help you create something beautiful. Grab your acrylic paints, brushes, and sketchbook, and let’s get started!
PS: If you’d like a step-by-step tutorial video on this fun painting, check out my online paint classes & purchase this class for just $12.
Step 1: Paint A Purple Sky on the Top Half of Your Page / Canvas
Starting at the top of your page, begin painting a purple sky. Gradient this sky with lighter purple tones, transitioning into darker & more vibrant purples.
If you’re looking for affordable and high-quality art supplies, head over to my Go-To Art Supplies blog, where I share all of my personal recommendations!

Step 2: Paint A Gradient Sunset
Transition your purple sky into a warm sunset by painting and blending in these colors, in this order:
- purple
- warm purple
- vibrant pink
- orange
- yellow
If you’re new to painting and want to improve your sketchbook skills, check out my Sketchbook Tips for Beginners. I break down simple, fun techniques that will help you get started with confidence!

Step3: Bring the Grass to Life
Next, paint the grassy area of your landscape. Start with a lighter shade of green that has hints of yellow, representing sunlit grass. As you move towards the foreground, darken the greens gradually to add depth and realism to the scene.

Looking for some additional artsy insight? Check out my Sketchbook Tips for Beginners blog article!
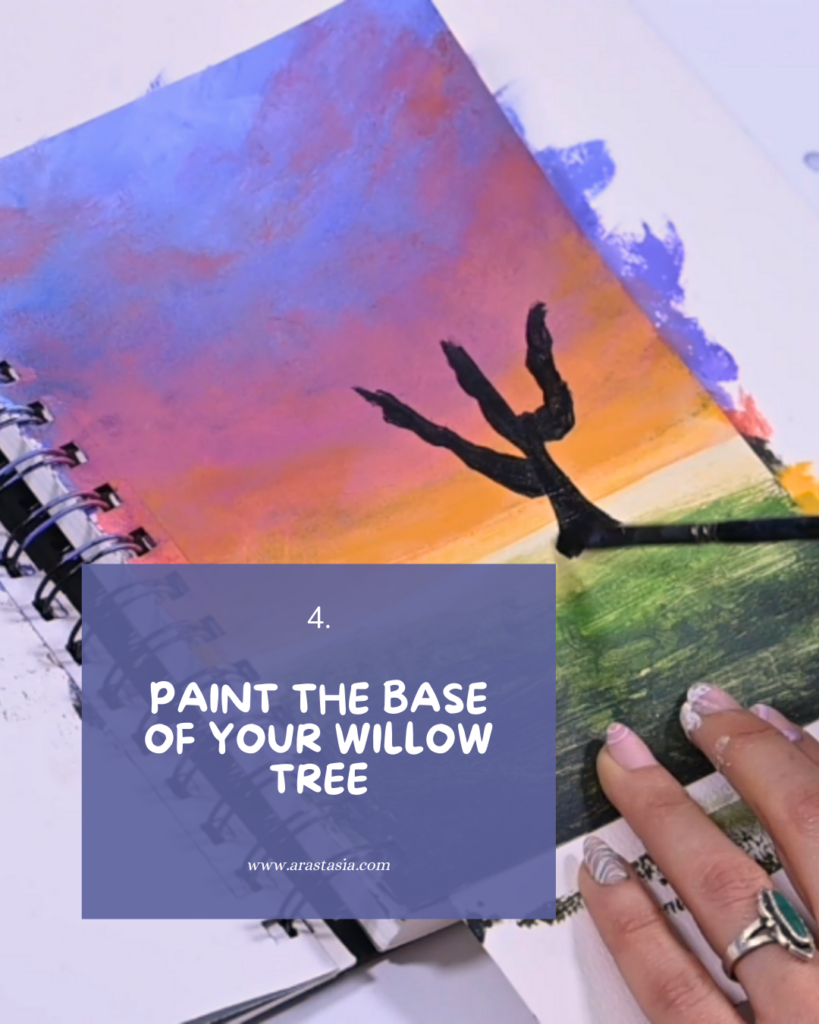
Step 4: Sketch the Weeping Willow’s Trunk and Branches
Sketch the trunk of your weeping willow using a long, squiggly rectangle shape. Add two curving limbs extending from the sides of the trunk. You can also think of this like you’re drawing a very messy version of the letter “Y.” Instead of having the top portion of your Y being symmetrical, stagger one side and make sure your lines are curvy.
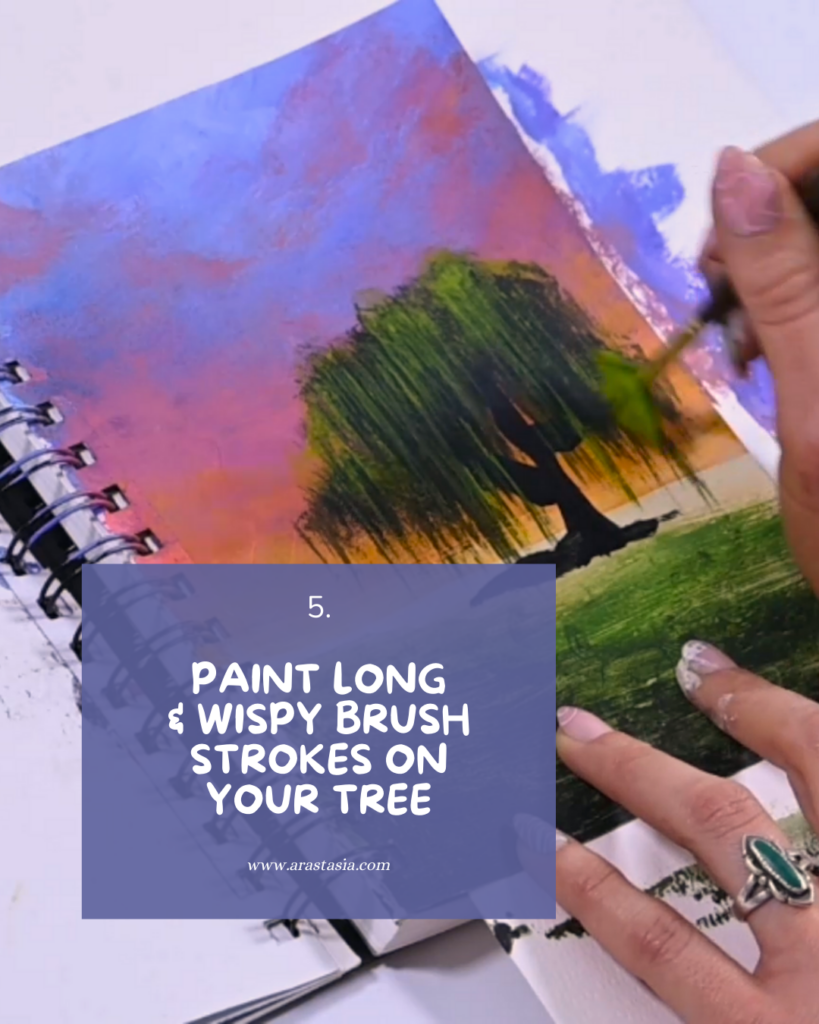
Step 5: Paint the Wispy Weeping Willow
Using a small to medium sized mop brush, apply dark green paint to create the wispy looking weeping willow. Start at the top of the trunk and lightly drag your brush downwards, creating those long, soft strands.
Step 6: Incorporate Wildflower Details
Using a small round brush, add soft little taps to create delicate wildflowers throughout the grass. Dab the brush with purples, whites, and oranges, then lightly tap it onto the canvas to create clusters of flowers. Vary the colors and sizes of the flowers for a natural and “wild” look.
If you prefer learning through video, I’ve got you covered! Check out my Timelapse Painting Videos on YouTube, where you can watch this weeping willow unfold in real-time.

Step 7: Add Final Details
Use a small, fine-line paint brush to add in final details to your flowers & weeping willow tree. To enhance the realism of the weeping willow, use a bright and vibrant green that will stand out against the greens already painted. To bring the flowers to life, add dark centers to some of them, and add in scattered blades of grass overlapping some of the wildflowers.

Have fun Painting!
Take your time with each step and really soak in the process. Don’t rush—this is your chance to get lost in your creativity. Remember, art is all about expressing yourself, so don’t be afraid to put your own spin on things. Make it yours, have fun with it, and trust the magic you bring to the canvas. You’ve got this! Happy painting!

Need some fresh inspiration for your next project? My blog on Acrylic Painting Ideas for Your Sketchbook is packed with creative ideas to get those artistic juices flowing!

Thanks for reading my love! Remember to stay shining and stay creating! ☀️
sincerely, your artsy friend that is rooting for you-


Arastasia Rolain – Traveling Mural Artist, Art Educator, & Creative Entrepreneur